
If you just installed WordPress and aren’t sure what to do next, this guide walks through the initial setup: core settings, choosing a theme, and installing your first plugins. It’s aimed at beginner developers building a tech blog, but the steps apply to most blog setups.
1. Basic Settings
Before touching themes or plugins, go through WordPress’s core settings under Settings in the sidebar.
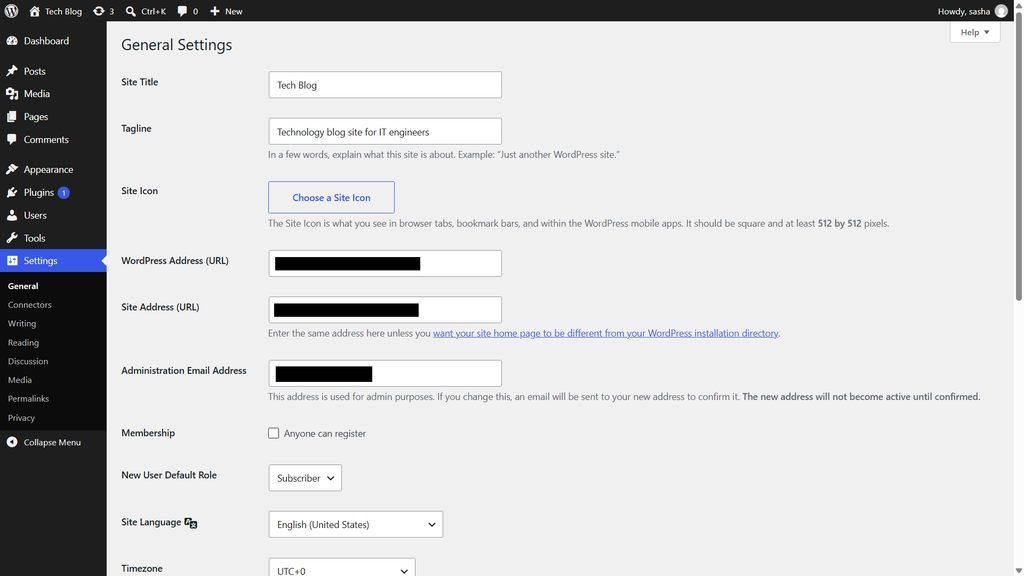
Site Title & Tagline (Settings > General) Set your site title and a short tagline describing what the blog is about. It’s a small thing, but it shows up in browser tabs and search results, so it’s worth getting right early.
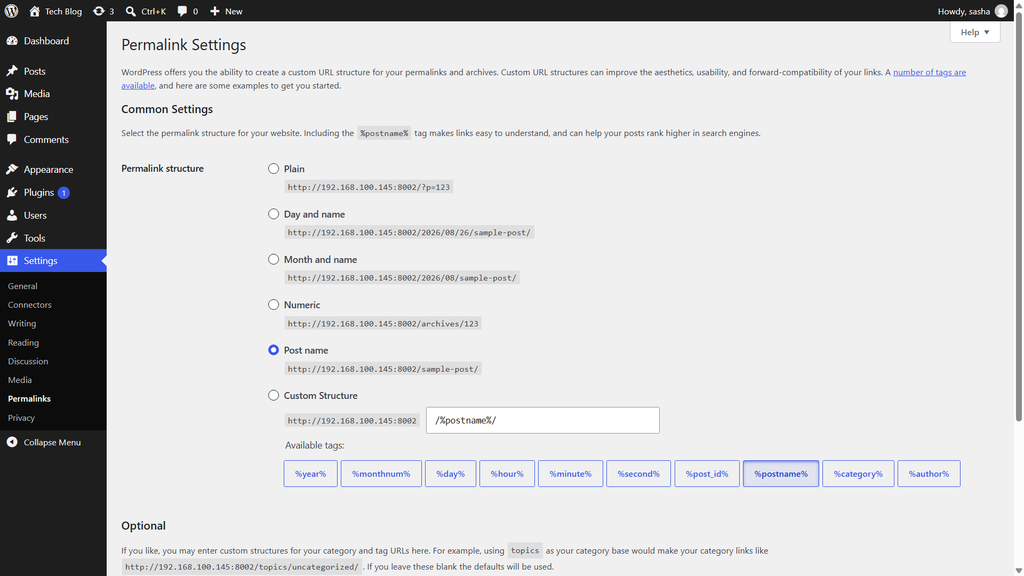
Permalinks (Settings > Permalinks) This one matters more than it looks. Permalinks control your URL structure, for example:
yoursite.com/?p=123          <- default, ugly
yoursite.com/my-post-name    <- "Post name" structure, clean
Choose Post name. It’s more readable, it’s better for SEO, and it’s important to decide this before publishing anything. Changing it later breaks every link that’s already been shared.
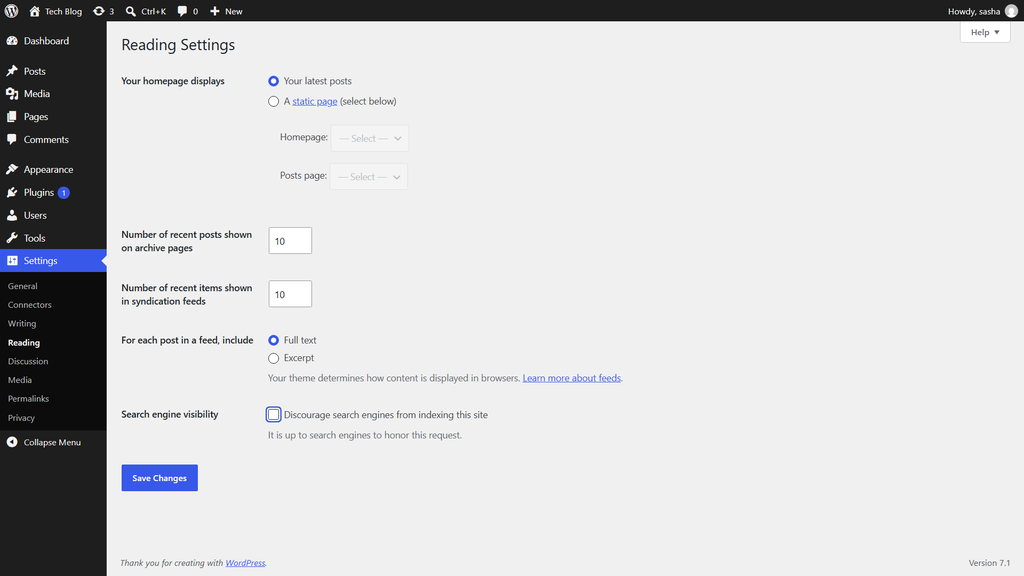
The “discourage search engines” gotcha (Settings > Reading) Fresh WordPress installs often have a checkbox enabled that tells search engines not to index the site. This makes sense while setting things up, but it’s easy to forget about. Remember to switch it off once the site is ready to go public.
Discussion settings (Settings > Discussion) Decide whether to keep comments on, and whether to require approval before they appear. Requiring approval leaves room for discussion without opening the door to spam.
2. Choosing a Theme
For a tech blog, a few things matter most:
- Speed: text and code heavy posts don’t need a heavy theme
- Clean typography: readability over flashy design
- Code block support: for posting code snippets clearly
- Block editor compatibility: the modern WordPress writing experience
Some popular free options:
| Theme | Best for | Notes |
|---|---|---|
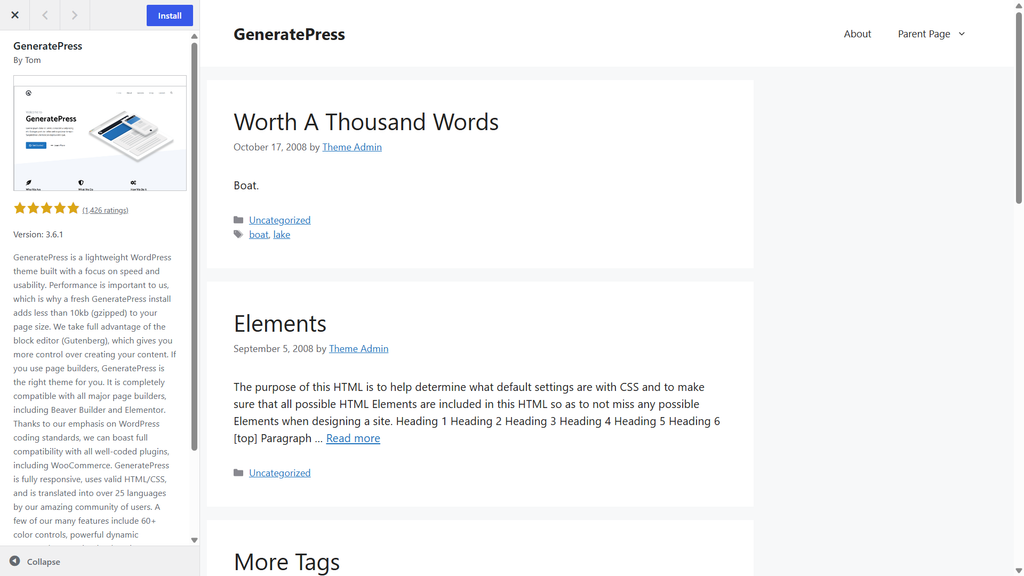
| GeneratePress | Developers who want clean code | Minimal, fast, easy to customize with CSS |
| Astra | Beginners who want templates | Huge library of starter designs |
| Kadence | More visual flexibility | Strong customizer, slightly more to learn |
Any of these are solid choices. GeneratePress tends to work well for developers who want a theme that stays out of the way and loads fast, with room to customize using plain CSS later.
To install a theme:
- Go to Appearance > Themes > Add Theme
- Search for the theme name
- Click Install, then Activate
3. Installing Plugins
A good rule is to install only what’s needed, one category at a time. It’s tempting to install ten plugins in one sitting, but every plugin adds a bit of extra weight and a bit of extra risk.
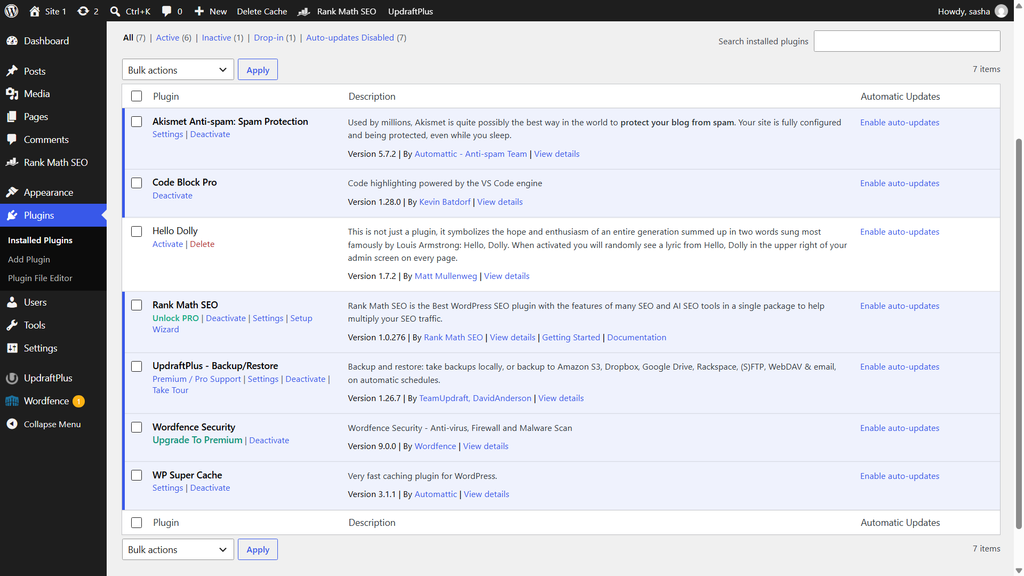
Recommended starting plugins:
- Rank Math SEO (or Yoast SEO): meta descriptions, sitemaps, basic SEO checks
- Wordfence Security: firewall and login protection
- Akismet: spam protection (often pre-installed, just needs activating)
- UpdraftPlus: scheduled backups, set up before there’s content worth losing
- Code Block Pro: proper syntax highlighting for code snippets
One important note: avoid running two plugins that do the same job. Two SEO plugins, or two caching plugins, active at once can conflict with each other. Pick one per category.
4. Things to Watch Out For
A few common mistakes worth avoiding:
- Spending too much time tuning the theme before there’s any content. It’s easy to lose an afternoon adjusting colors and fonts on an empty site.
- Setting up backups only after something goes wrong, instead of before.
- Leaving the permalink structure until later. It’s much harder to fix once links are already shared.
- Ignoring code display. For a tech blog, unformatted code snippets hurt readability more than most other design choices.
What’s Next
With settings, a theme, and core plugins in place, the next step is writing the first post and setting up categories and tags so the blog doesn’t turn into an unsorted pile of articles.